 how-to
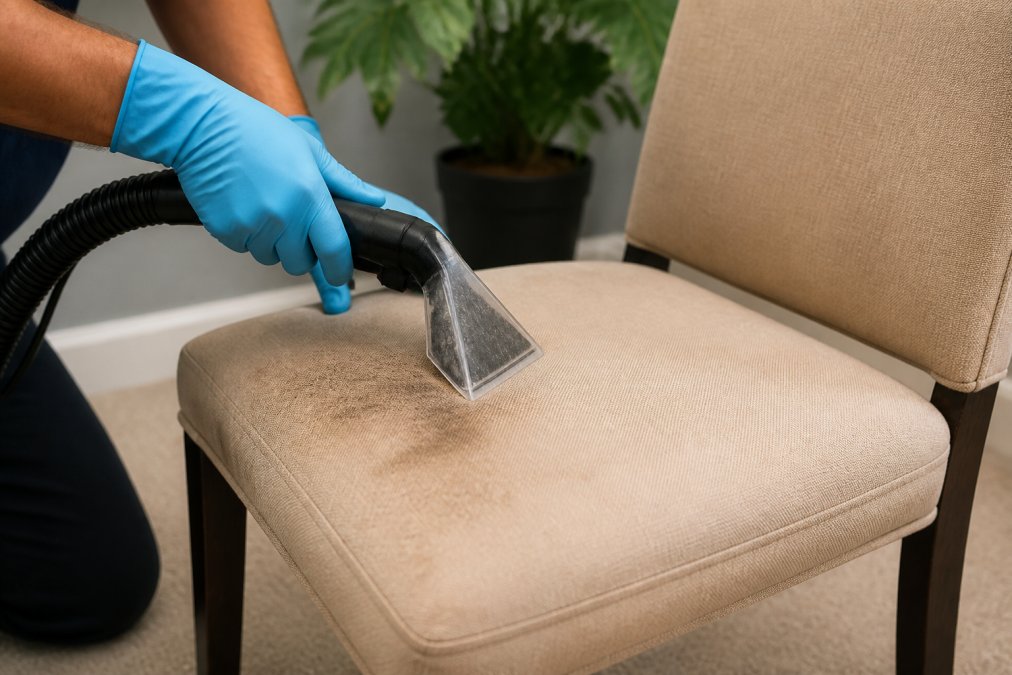
Best Way to Clean Stained Upholstered Chairs
Table of Contents
- Preparation: Vacuuming and Fabric Assessment
- Upholstery Cleaning Codes Explained
- How to Remove Set-in Stains from Fabric
- Step-by-Step Stain Removal Process
- Upholstery Cleaning for Sensitive Skin
- Drying, Deodorizing, and Maintenance
- When to Choose Professional Upholstery Cleaning Services
- Frequently Asked Questions
Last Updated: September 21, 2026
Preparation: Vacuuming and Fabric Assessment
Before you tackle any stain, prepare your chair properly. This step determines whether your cleaning effort succeeds or damages the fabric.
Start by vacuuming thoroughly. Use the upholstery attachment on your vacuum to remove dust, crumbs, and loose debris from every surface. Pay special attention to seams, piping, and crevices where dirt accumulates. This prevents dirt from mixing with your cleaning solution and creating a muddy residue.
Check the Upholstery Cleaning Code
Every upholstered chair comes with a fabric care label. Find it, usually on the underside or back of the chair. Look for a letter code that tells you which cleaning methods are safe.
The code system is straightforward:
- S = Solvent-based cleaners only (no water)
- W = Water-based cleaners only
- SW = Both solvent and water-based cleaners safe
- X = Vacuum or brush only (no liquid cleaners)
If your chair is marked X, stop here. Liquid cleaners will damage the fabric. Stick to vacuuming and light brushing with a soft-bristled brush.
For S, W, or SW codes, you can proceed with cleaning solutions. This code prevents you from ruining expensive upholstery by using the wrong method.
Vacuum Thoroughly and Test for Colorfastness
After vacuuming, test your cleaning solution on a hidden area. Use the underside of the chair, a corner, or the back where nobody sits.
Apply a small amount of your chosen cleaning solution to a white cloth. Gently dab the hidden fabric spot. Wait five minutes. If color bleeds onto the cloth, your solution is too strong or the dye isn't colorfast. Switch to a milder solution or call a professional.
This test takes two minutes and saves your chair from permanent damage.
Upholstery Cleaning Codes Explained
Understanding fabric codes is the foundation of safe upholstery cleaning. Manufacturers developed this system to protect expensive furniture from improper cleaning methods that destroy fibers.
The S code means solvent-based cleaners only. These are dry-cleaning solvents, not water. They work by dissolving oils and grease without saturating the fabric. Use products labeled "dry-cleaning solvent" or "upholstery solvent." Never use water on S-coded fabric, it can cause permanent staining and shrinkage.
The W code means water-based cleaners are safe. This includes DIY solutions made with water, vinegar, and mild dish soap. Water-based cleaning is gentler on most fabrics and dries faster. It's the most common code you'll encounter on modern upholstery.
The SW code gives you flexibility. Both solvent and water-based methods work. Start with water-based solutions since they're safer and easier to control. If water doesn't remove the stain, try a solvent-based cleaner next.
The X code is the restriction. No liquids. Vacuuming and dry brushing are your only options. These delicate fabrics, often natural fibers like silk or wool, can't handle moisture. Pushing liquid into X-coded fabric can cause permanent damage that professional cleaners might not fix.
When in doubt, contact the furniture manufacturer or call a professional service.
How to Remove Set-in Stains from Fabric
Set-in stains are stubborn because they've bonded to the fabric fibers over time. Fresh stains are easier to lift, but set-in stains need pre-treatment and patience.
Pre-Treatment Methods
Pre-treatment prepares the stain for cleaning. It breaks down the stain's bond to the fabric so your cleaning solution can lift it more effectively.
Common pre-treatment approaches include:
- Shaving cream method: Apply a small amount of non-gel shaving cream directly to the stain. Let it sit for 5-10 minutes. The cream softens the stain without saturating the fabric. Blot gently with a damp cloth.
- Laundry stain remover: Some laundry pre-treatments work on upholstery too. Test on a hidden area first. Apply sparingly, wait 10 minutes, then blot.
- Hydrogen peroxide: For light-colored fabrics, hydrogen peroxide can lighten set-in stains. Apply a small amount, wait a few minutes, then blot. Test first, it can bleach darker fabrics.
The key is patience. Let the pre-treatment sit long enough to work, but not so long that it dries and sets into the fabric.
DIY Cleaning Solutions for Spot Cleaning
You likely have the ingredients for effective cleaning solutions at home. According to Clean and Scentsible household cleaning guidance, common mixtures include warm water combined with vinegar and mild dish soap, or hydrogen peroxide for heavily soiled areas.
Basic water-and-soap solution:
- 1 cup warm water
- 1/2 teaspoon mild dish soap (not laundry detergent)
- Mix gently until barely foamy
This works on most water-safe fabrics. The soap breaks down oils while water lifts dirt. Use sparingly, oversaturation is the biggest DIY cleaning mistake.
Vinegar solution for odors and tough stains:
- 1 cup warm water
- 1 tablespoon white vinegar
- 1/2 teaspoon mild dish soap
Vinegar cuts through grease and neutralizes odors. It's gentler than commercial cleaners but still effective on set-in stains.
Hydrogen peroxide for light fabrics:
- 1 part 3% hydrogen peroxide
- 1 part water
This works on pale upholstery. It lifts stains without harsh chemicals. Never use on dark fabrics, it bleaches.
Mix solutions in a spray bottle for easy application. Label it clearly. Never mix vinegar with hydrogen peroxide, the combination creates toxic chlorine gas.
Blotting vs. Rubbing: The Right Technique
This is where most DIY attempts fail. People rub stains, which pushes them deeper into the fabric.
Blotting lifts stains out. Rubbing grinds them in.
Always blot. Use a clean white cloth or microfiber cloth, not paper towels, which shred and leave fibers behind. Press the cloth onto the stain with firm, steady pressure. Hold for a few seconds. Lift straight up. Repeat with a fresh section of cloth each time.
Work from the outside of the stain toward the center. This prevents the stain from spreading outward.
Never scrub in circular motions. Never use a brush on the stain itself, brushes are for vacuuming, not cleaning. The gentle blotting motion removes the stain without damaging fibers.
For stubborn stains, blot, wait 2-3 minutes for the cleaning solution to work, then blot again. Patience beats pressure every time.
Step-by-Step Stain Removal Process
Follow this sequence for the best results when you clean stained upholstered chairs.
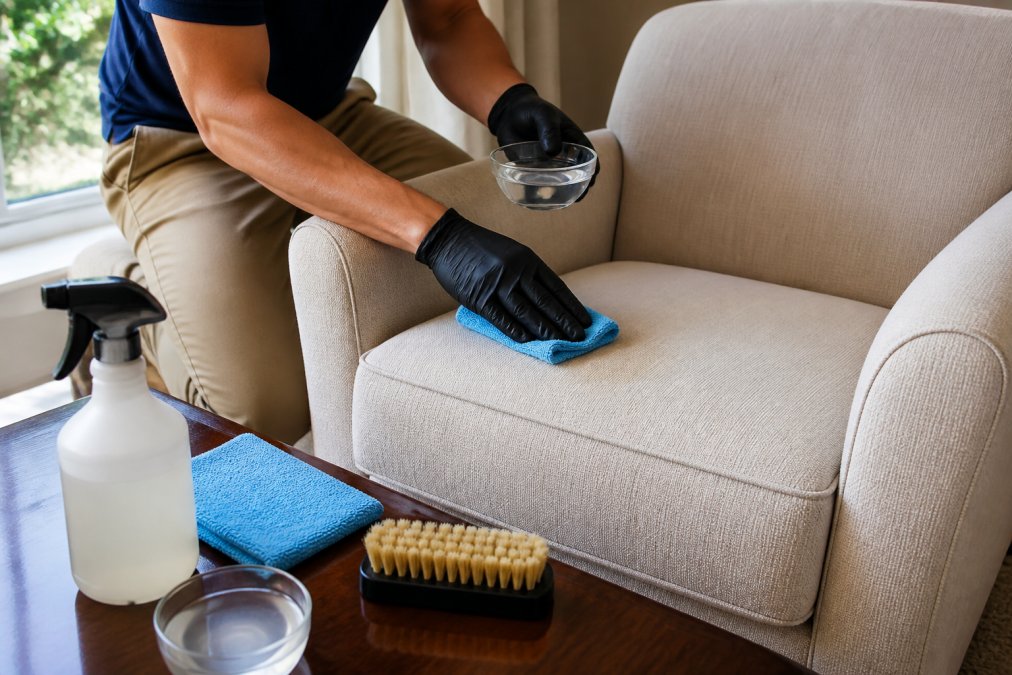
Step 1: Vacuum the entire chair (5 minutes) Use the upholstery attachment. Get into seams and crevices. Remove all loose debris.
Step 2: Locate and identify the stain (2 minutes) Mark the stain's edges mentally.
Total time: 45 minutes active work, plus drying time.
Upholstery Cleaning for Sensitive Skin
Families with young children and people with allergies need special care when cleaning upholstery. Harsh chemicals linger in fabric and irritate skin.
Natural cleaning options:
- White vinegar and water: Vinegar is antimicrobial and safe for skin contact. Mix one part vinegar with three parts water. It removes stains and neutralizes odors without chemical fumes.
- Baking soda: Sprinkle dry baking soda on the chair and let it sit for 15 minutes. Vacuum thoroughly. Baking soda absorbs odors and lifts light stains without moisture.
- Castile soap: This plant-based soap is hypoallergenic. Mix one teaspoon with two cups of water. It cleans gently without irritating sensitive skin.
- Lemon juice and salt: Mix equal parts lemon juice and salt into a paste. Apply to stains, wait 10 minutes, then blot. Lemon is a natural degreaser.
Drying, Deodorizing, and Maintenance
Proper drying prevents mold, mildew, and musty odors. It's the step most people skip, and it costs them.
Air Circulation and Moisture Control
Moisture trapped in upholstery creates mold. Speed up drying by controlling airflow.
Deodorizing Upholstery Naturally
After stain removal, odors sometimes linger. Deodorize without chemicals.
Baking soda method: Sprinkle baking soda over the entire chair. Let it sit for 15-30 minutes. Vacuum thoroughly with the upholstery attachment. Baking soda neutralizes odors at the source without fragrance masking.
When to Choose Professional Upholstery Cleaning Services
DIY cleaning works for fresh, small stains on accessible areas. Professional cleaning handles the tough jobs.
Call a professional when:
- The stain is large, set-in, or covers multiple areas
- Your chair has an S cleaning code (solvent-based only)
- You've tried DIY methods and the stain remains
- The fabric is delicate, valuable, or antique
- You need deep cleaning for odors or allergen removal
- The stain involves ink, wine, grease, or pet accidents
- You want guaranteed results without risk of damage
Frequently Asked Questions
Can you use Dawn dish soap to clean upholstered chairs?
Yes, but with caution. Mix a small amount of mild dish soap (like Dawn) with warm water to create a gentle cleaning solution for spot cleaning stained upholstered chairs. Use only a few drops to avoid oversaturation and residue buildup. Always test the solution on a hidden area first to ensure it doesn't damage the fabric or cause discoloration. For heavily soiled areas, this mixture works well for blotting stains, but avoid rubbing aggressively.
How do you get old, set-in stains out of fabric chairs?
Set-in stains require pre-treatment before the standard cleaning process. Apply shaving cream (non-gel) or a laundry stain remover to the stain and let it sit for 15-30 minutes. For stubborn stains, hydrogen peroxide can work on light-colored fabrics. After pre-treatment, use a damp sponge with your cleaning solution and blot repeatedly, working from the outside of the stain inward. Multiple applications may be needed for older stains that have dried deep into the fabric.
Is it safe to steam clean upholstered chairs?
Steam cleaning can work for some upholstery, but check the manufacturer's cleaning code first. Fabrics labeled with an 'S' code should only be cleaned with solvent-based methods, not water or steam. 'W' codes allow water-based cleaning, and 'SW' codes permit both. Steam can cause shrinkage, color bleeding, or damage to delicate fabrics. If your chairs lack a cleaning code label, test steam on a hidden area or consider professional upholstery cleaning services to avoid permanent damage.
What is the best cleaner for stains on upholstery?
The best cleaner depends on the stain type and fabric. For general stains, a mixture of warm water and mild dish soap works well. Vinegar and water (1:1 ratio) is effective for many stains but should be tested first. For pet accidents and odors, enzymatic cleaners break down organic matter. Always check the upholstery code before using any solution, spot-test on hidden fabric, and blot rather than rub to avoid spreading the stain deeper into the fibers.
Stained upholstered chairs don't have to stay that way. Most stains respond well to patient blotting, gentle solutions, and proper drying. For stubborn stains or delicate fabrics, Sanctified Carpet & Upholstery Cleaning provides professional upholstery detailing with personable service and competitive pricing. Send a message to get a quote for your specific stain and furniture type.